Yogurt Custard Toast Air Fryer – A Simple, Sweet Breakfast Treat
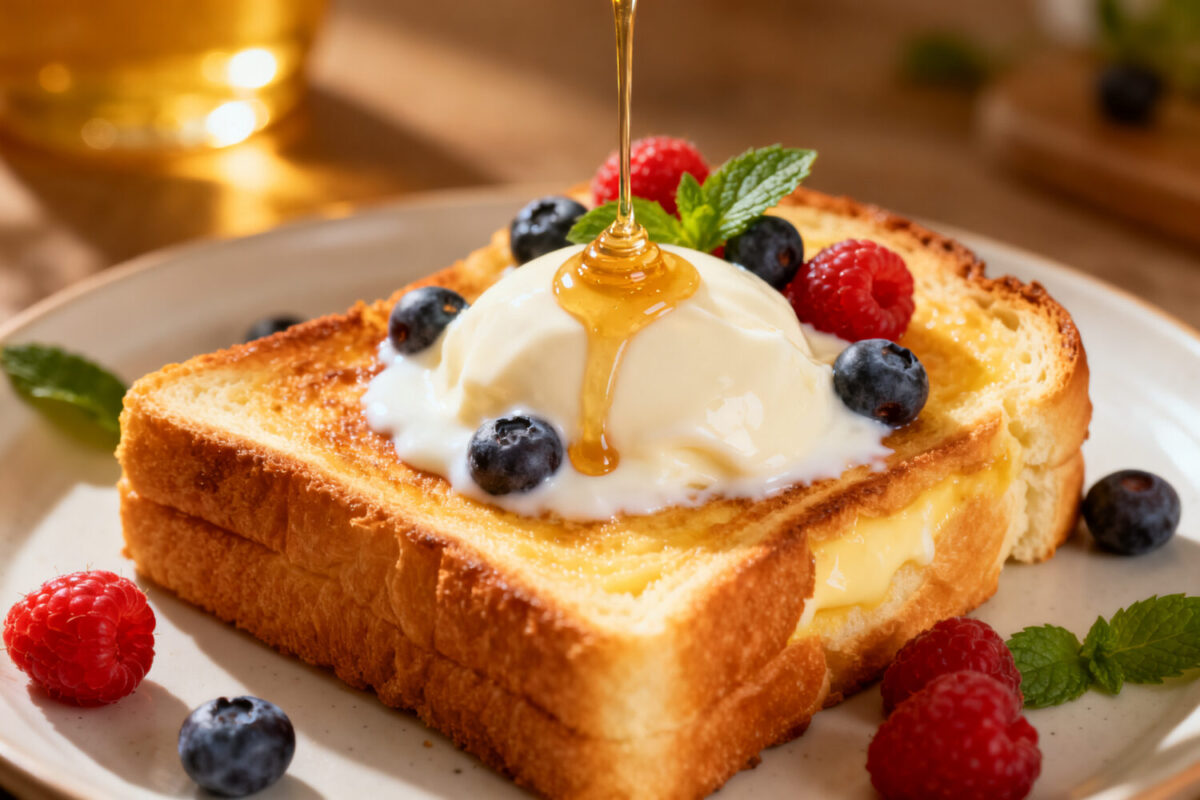
If you love a quick breakfast that feels a little fancy, yogurt custard toast is your new go-to. It’s buttery, crisp on the outside, and creamy in the center—like a mini cheesecake on toast. The air fryer makes it fast, consistent, and mess-free.
You only need a handful of pantry staples, and the whole thing comes together in under 15 minutes. It’s perfect for slow weekends, busy weekdays, or a fun snack any time of day.

Yogurt Custard Toast Air Fryer - A Simple, Sweet Breakfast Treat
Ingredients
- Bread: Thick-sliced brioche, challah, or sturdy white/sourdough works best.
- Greek yogurt: Plain or vanilla; full-fat or 2% for a creamier custard.
- Egg: One large egg to bind the custard.
- Sweetener: Sugar, honey, maple syrup, or agave.
- Vanilla extract: Optional, but it adds warmth and dessert-like flavor.
- Pinch of salt: Balances sweetness.
- Toppings: Fresh berries, sliced bananas, chocolate chips, jam, cinnamon, or a dusting of powdered sugar.
- Cooking spray or butter: Lightly grease the air fryer basket or brush the bread edges for extra crispness.
Instructions
- Preheat your air fryer: Set it to 350°F (175°C) for a few minutes so it’s ready when you are.
- Make the custard: In a small bowl, whisk 1/3 cup Greek yogurt, 1 egg, 1–2 teaspoons sweetener, 1/4 teaspoon vanilla extract, and a pinch of salt until smooth.
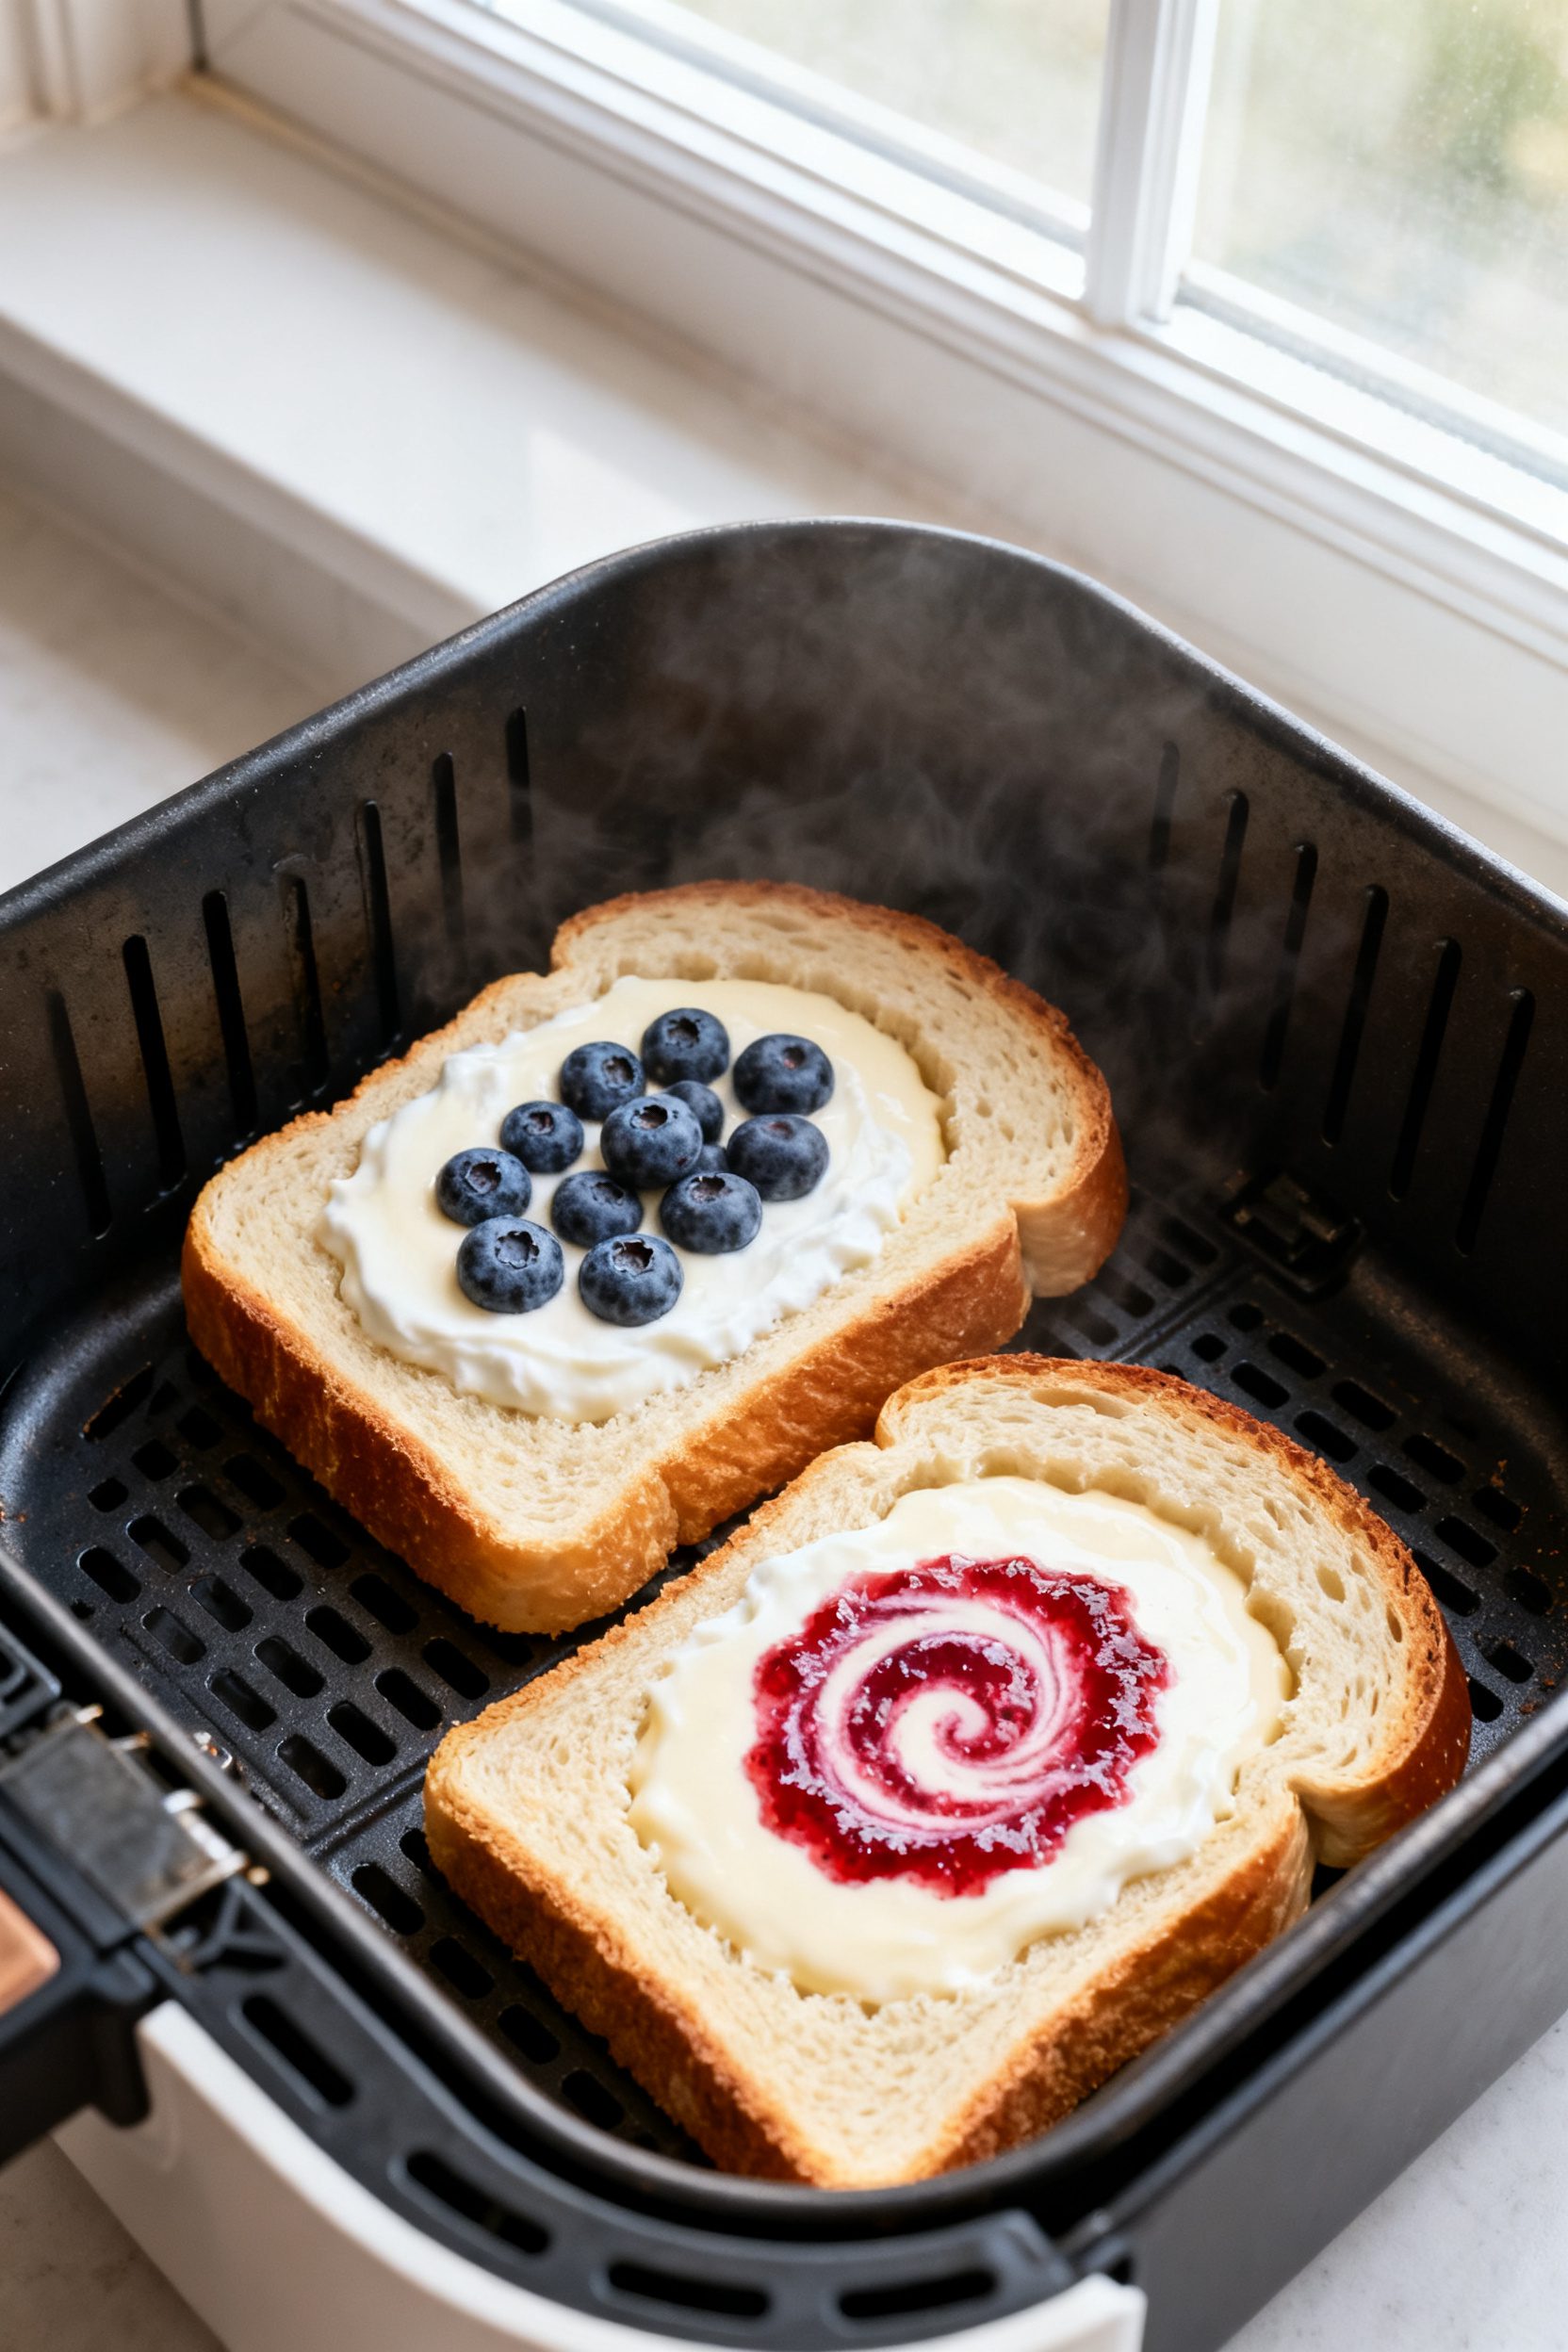
- Prep the bread: Use 2 slices of thick bread. With the back of a spoon, press a shallow well into the center of each slice, leaving a 1/2-inch border. This helps hold the custard.
- Optional richness: Lightly butter the outer edges of the bread or mist the basket with cooking spray for extra crisping.
- Fill with custard: Spoon the mixture into the wells. Don’t overfill—aim for an even layer that reaches the edges but doesn’t spill over.
- Add toppings: Place berries, a few chocolate chips, or a sprinkle of cinnamon on top. If using very juicy fruit, pat it dry first.
- Air fry: Arrange the slices in a single layer in the basket. Cook at 350°F (175°C) for 6–8 minutes, until the edges turn golden and the custard is just set in the center.
- Check doneness: The custard should be slightly jiggly but not runny. If needed, cook 1–2 minutes more. Avoid overcooking or it will crack.
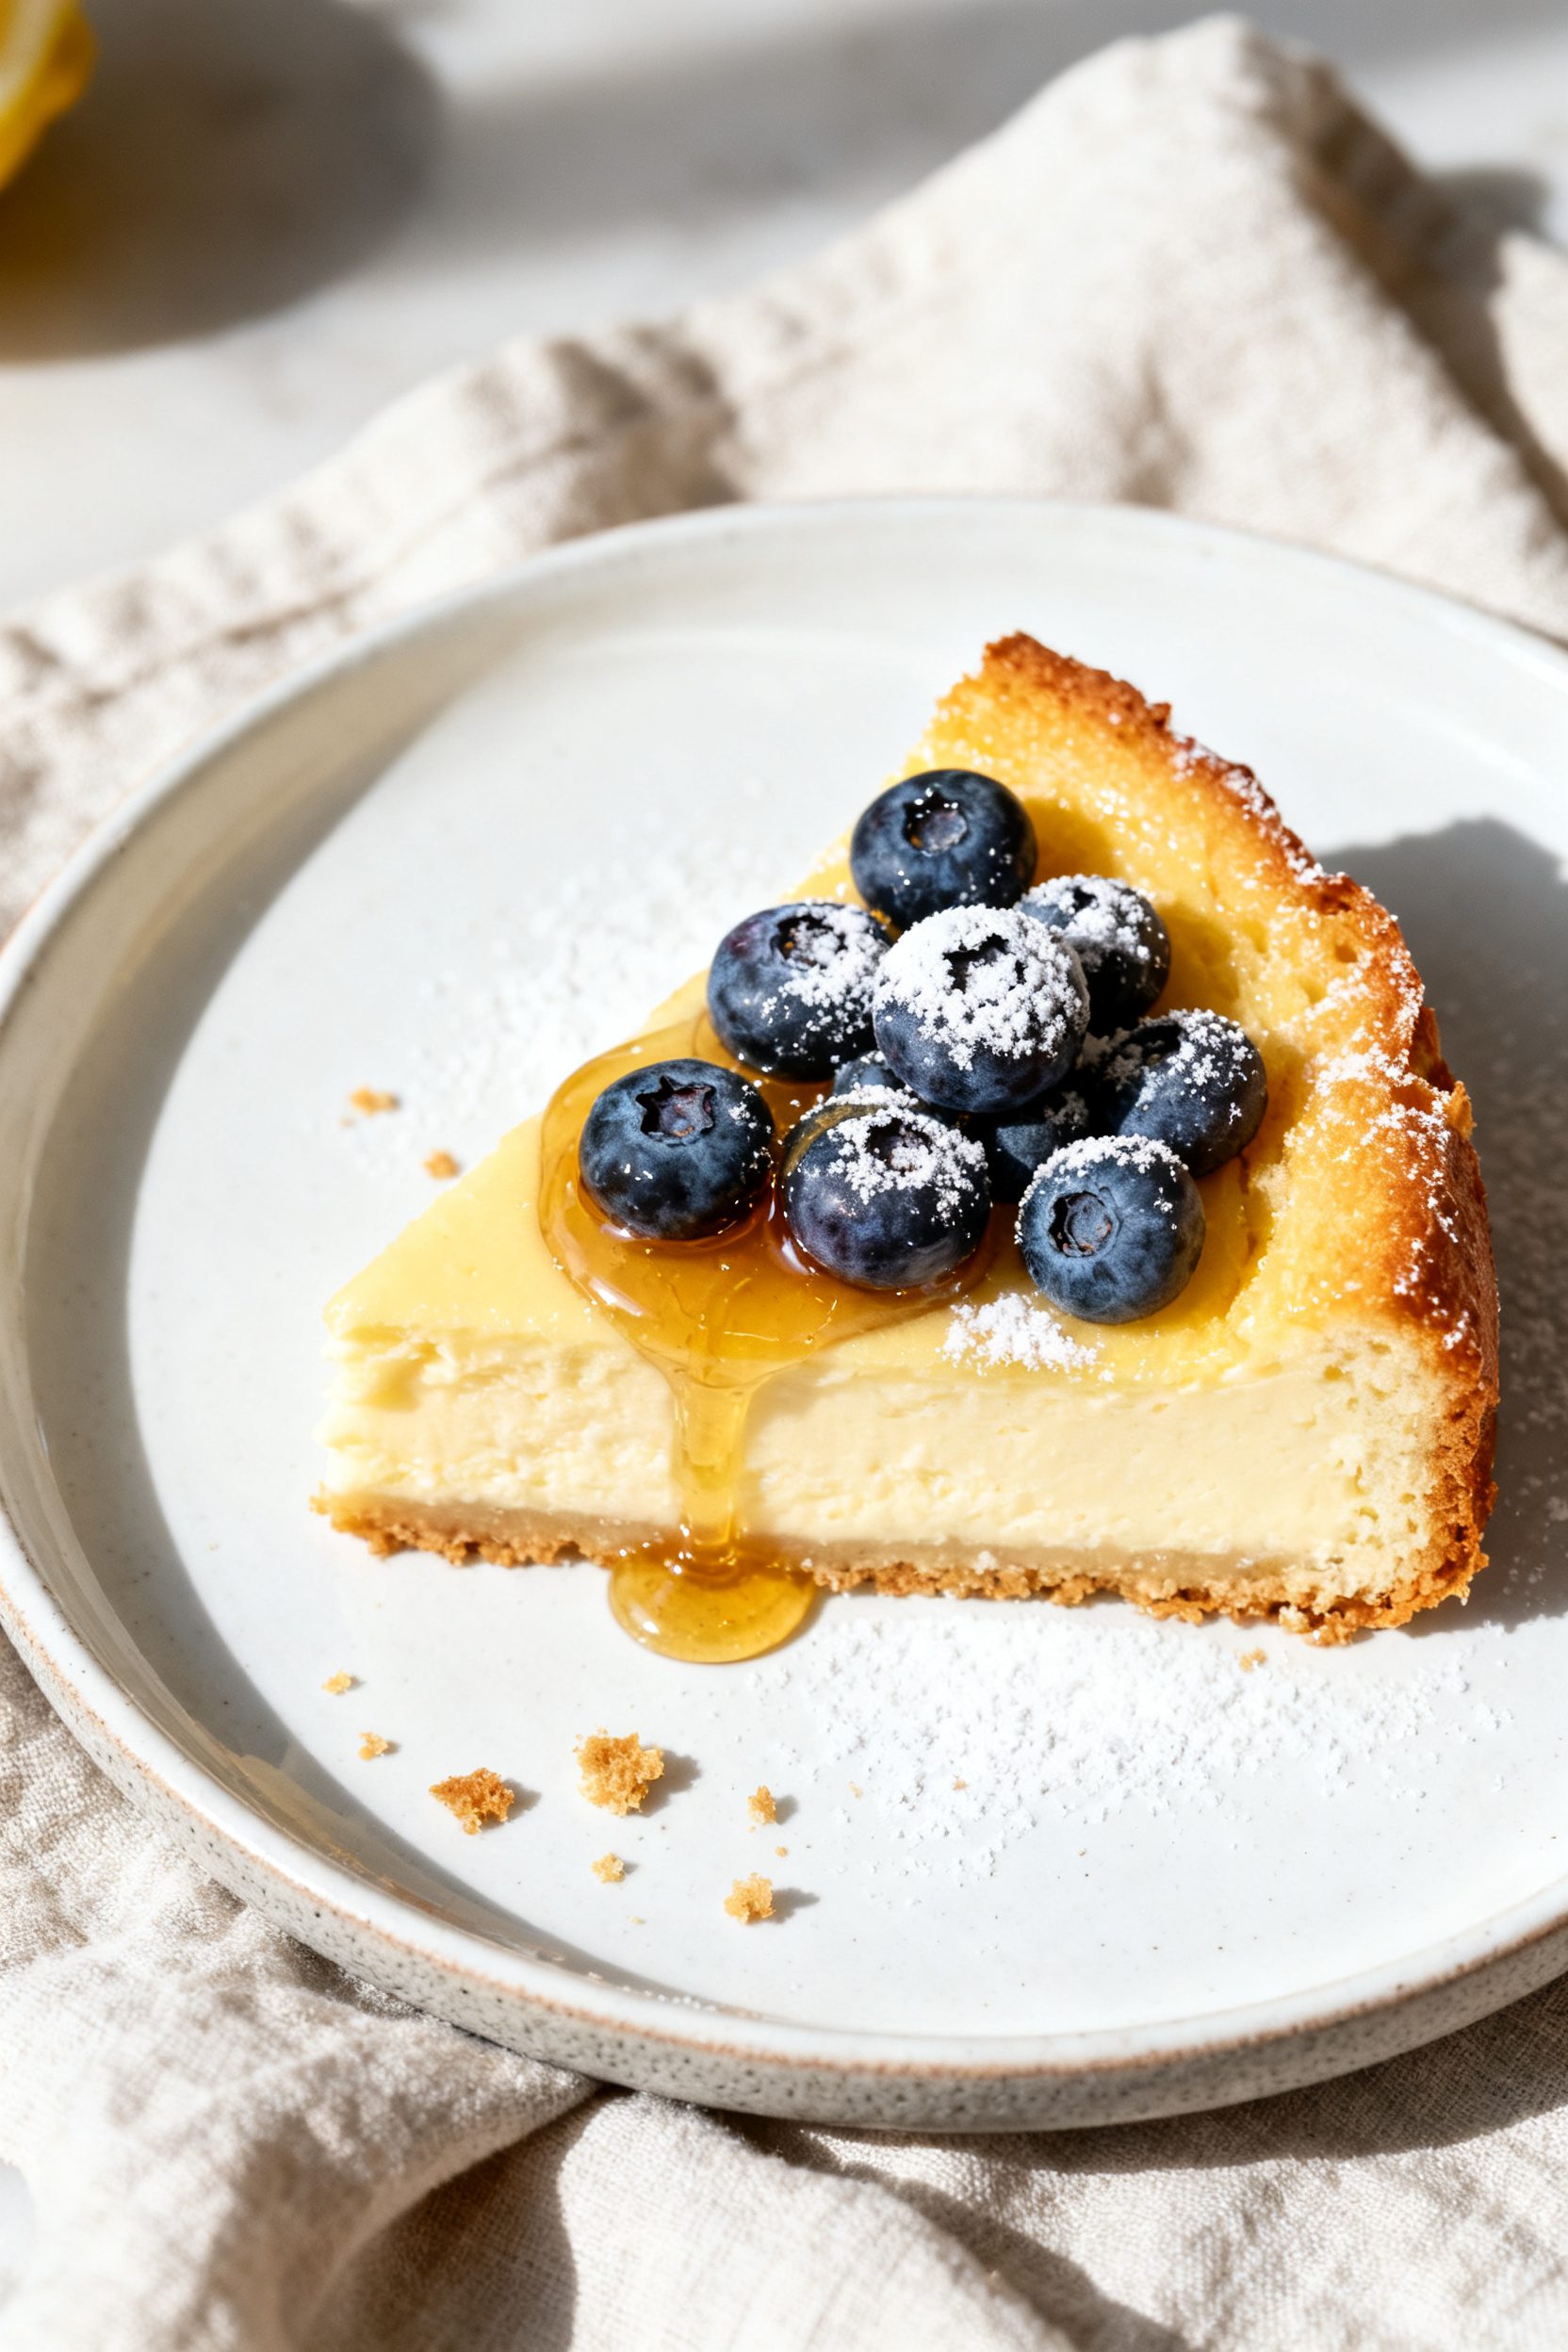
- Finish and serve: Let it rest 1 minute. Add a drizzle of honey or a dusting of powdered sugar if you like. Serve warm.
What Makes This Recipe So Good
- Fast and fuss-free: From mixing to munching in about 10 minutes. The air fryer preheats quickly and cooks evenly.
- Inexpensive ingredients: Bread, yogurt, egg, and a little sweetener—things you likely already have.
- Customizable: Add fruit, chocolate, spices, or a drizzle of honey.
It adapts to any craving.
- Great texture: Crisp toast base with a silky, slightly tangy custard on top. It’s light but satisfying.
- Kid-friendly and adult-approved: Make it colorful with berries or keep it simple and classic.
Shopping List
- Bread: Thick-sliced brioche, challah, or sturdy white/sourdough works best.
- Greek yogurt: Plain or vanilla; full-fat or 2% for a creamier custard.
- Egg: One large egg to bind the custard.
- Sweetener: Sugar, honey, maple syrup, or agave.
- Vanilla extract: Optional, but it adds warmth and dessert-like flavor.
- Pinch of salt: Balances sweetness.
- Toppings: Fresh berries, sliced bananas, chocolate chips, jam, cinnamon, or a dusting of powdered sugar.
- Cooking spray or butter: Lightly grease the air fryer basket or brush the bread edges for extra crispness.
Step-by-Step Instructions
- Preheat your air fryer: Set it to 350°F (175°C) for a few minutes so it’s ready when you are.
- Make the custard: In a small bowl, whisk 1/3 cup Greek yogurt, 1 egg, 1–2 teaspoons sweetener, 1/4 teaspoon vanilla extract, and a pinch of salt until smooth.
- Prep the bread: Use 2 slices of thick bread. With the back of a spoon, press a shallow well into the center of each slice, leaving a 1/2-inch border.
This helps hold the custard.
- Optional richness: Lightly butter the outer edges of the bread or mist the basket with cooking spray for extra crisping.
- Fill with custard: Spoon the mixture into the wells. Don’t overfill—aim for an even layer that reaches the edges but doesn’t spill over.
- Add toppings: Place berries, a few chocolate chips, or a sprinkle of cinnamon on top. If using very juicy fruit, pat it dry first.
- Air fry: Arrange the slices in a single layer in the basket.
Cook at 350°F (175°C) for 6–8 minutes, until the edges turn golden and the custard is just set in the center.
- Check doneness: The custard should be slightly jiggly but not runny. If needed, cook 1–2 minutes more. Avoid overcooking or it will crack.
- Finish and serve: Let it rest 1 minute.
Add a drizzle of honey or a dusting of powdered sugar if you like. Serve warm.
Keeping It Fresh
Best same-day: Yogurt custard toast tastes best straight from the air fryer when the bread is crisp and the custard is creamy. If you have leftovers, cool completely before storing.
Short-term storage: Refrigerate in an airtight container for up to 24 hours.
To reheat, air fry at 320°F (160°C) for 3–4 minutes or until warmed through. Microwaving is convenient but softens the toast.
Make-ahead tips: Mix the custard up to 2 days ahead and store it covered in the fridge. Assemble and cook right before serving for the best texture.
Benefits of This Recipe
- Balanced bite: Protein from Greek yogurt and egg, carbs from bread, and optional fruit for natural sweetness.
- Portion control: Single-serve slices keep things simple and reduce waste.
- No oven required: Great for small kitchens, hot days, or quick breakfasts.
- Kid-helper friendly: Little hands can press the bread wells and sprinkle toppings.
- Year-round appeal: Swap toppings with the seasons—berries in summer, apples and cinnamon in fall.
What Not to Do
- Don’t soak the bread: Overfilling makes the custard spill over and soggy the edges.
- Don’t crowd the basket: Air flow is key.
Work in batches for even browning.
- Don’t use ultra-thin bread: It won’t hold the custard. Choose slices at least 3/4 inch thick.
- Don’t skip drying wet fruit: Excess moisture can water down the custard and prevent it from setting.
- Don’t crank up the heat: Higher temps can scorch the bread before the custard sets.
Recipe Variations
- Lemon cheesecake toast: Stir in 1 teaspoon lemon zest and 1 teaspoon lemon juice. Top with blueberries and a light honey drizzle.
- Cinnamon roll toast: Add 1/2 teaspoon cinnamon to the custard.
After cooking, glaze with a quick mix of powdered sugar and milk.
- Berry jam swirl: Dollop a teaspoon of raspberry or strawberry jam into the custard and swirl gently before air frying.
- Chocolate hazelnut: Spread a thin layer of hazelnut spread under the custard and top with chopped hazelnuts.
- Protein boost: Use high-protein Greek yogurt and whisk in 1 teaspoon vanilla protein powder. Sweeten to taste.
- Dairy-free: Use a thick dairy-free yogurt (like coconut or almond) and a plant-based brioche. Results will be slightly less creamy, but still delicious.
- Savory twist: Skip the sugar and vanilla.
Add a pinch of salt and pepper, sprinkle with chives, and top with cherry tomatoes and feta after cooking.
FAQ
Can I use regular yogurt instead of Greek yogurt?
Yes, but strain it first or use slightly less to keep the custard thick. Greek yogurt is ideal because its lower water content helps the custard set quickly without making the bread soggy.
What if I don’t have an air fryer?
Bake in a preheated oven at 375°F (190°C) for 10–12 minutes on a parchment-lined sheet until the custard is set and the edges are golden. A toaster oven works too; check at 8 minutes.
How do I prevent the custard from leaking off the bread?
Press a deeper well into the bread and avoid overfilling.
Thicker slices help. You can also lightly toast the bread first for a sturdier base.
Is it safe to eat if the custard is a little jiggly?
A slight jiggle in the center is fine as long as it’s not runny. The residual heat continues to set the custard after you pull it from the air fryer.
Which bread works best?
Soft, thick slices like brioche or challah give a tender crumb with a crisp crust.
Sourdough works if it’s not too holey; the custard can seep through large gaps.
Can I make it gluten-free?
Absolutely. Use your favorite thick-sliced gluten-free bread. Just watch the timing—some gluten-free breads brown faster, so check a minute early.
How sweet should the custard be?
It’s flexible.
Start with 1 teaspoon of sugar or honey for lightly sweet and go up to 2 teaspoons if you’re adding tart fruit or prefer a dessert-like flavor.
Can I add frozen fruit?
Yes, but thaw and pat dry first. Frozen berries straight from the freezer release too much liquid and can keep the custard from setting properly.
How do I scale this for a crowd?
Whisk a larger batch of custard and assemble multiple slices. Air fry in batches, or use the oven method for more capacity.
Keep cooked slices warm at 200°F (95°C) for up to 15 minutes.
What’s the best way to reheat leftovers?
Air fry at 320°F (160°C) for 3–4 minutes to restore the crisp edges without overcooking the custard. Avoid microwaving if you want to keep the toast crisp.
In Conclusion
Yogurt custard toast in the air fryer is a low-effort, high-reward breakfast you can pull off any day of the week. It’s simple, fast, and endlessly customizable, with a creamy center and crisp edges that hit the spot.
Keep the ingredients on hand, switch up the toppings, and you’ve got a reliable, feel-good meal ready in minutes. Once you try it, you’ll wonder why you ever waited for the oven.