Frozen Air Fryer Breakfast Sandwich – Quick, Crispy, and Satisfying

If you’ve got a frozen breakfast sandwich and an air fryer, you’ve got a hot meal in minutes. No soggy bread, no cold centers—just a crispy, melty, grab-and-go sandwich that actually tastes fresh. This method works for most brands and styles, from English muffins to croissants.
It’s perfect for busy mornings, late-night cravings, or when you want something comforting without the fuss. Let’s make breakfast easy and delicious.

Frozen Air Fryer Breakfast Sandwich - Quick, Crispy, and Satisfying
Ingredients
- Frozen breakfast sandwiches (any brand; English muffin, bagel, biscuit, or croissant)
- Optional add-ons: sliced cheese, hot sauce, ketchup, mustard, pesto
- Optional fresh extras: tomato slices, avocado, spinach, red onion
- Oil spray (for the basket, if your air fryer tends to stick)
- Foil or parchment (optional, for easy cleanup)
Instructions
- Preheat the air fryer to 350°F (175°C) for 3–4 minutes. Preheating helps the bread get crisp without overcooking the middle.
- Unwrap the sandwich. Remove any plastic or paper. If the sandwich is wrapped in a paper sleeve, discard it—it can block air flow.
- Split the sandwich if possible. Gently separate the bread from the egg/meat/cheese while still frozen. This helps heat the middle faster. If it won’t budge, heat it whole for a couple of minutes first, then separate.
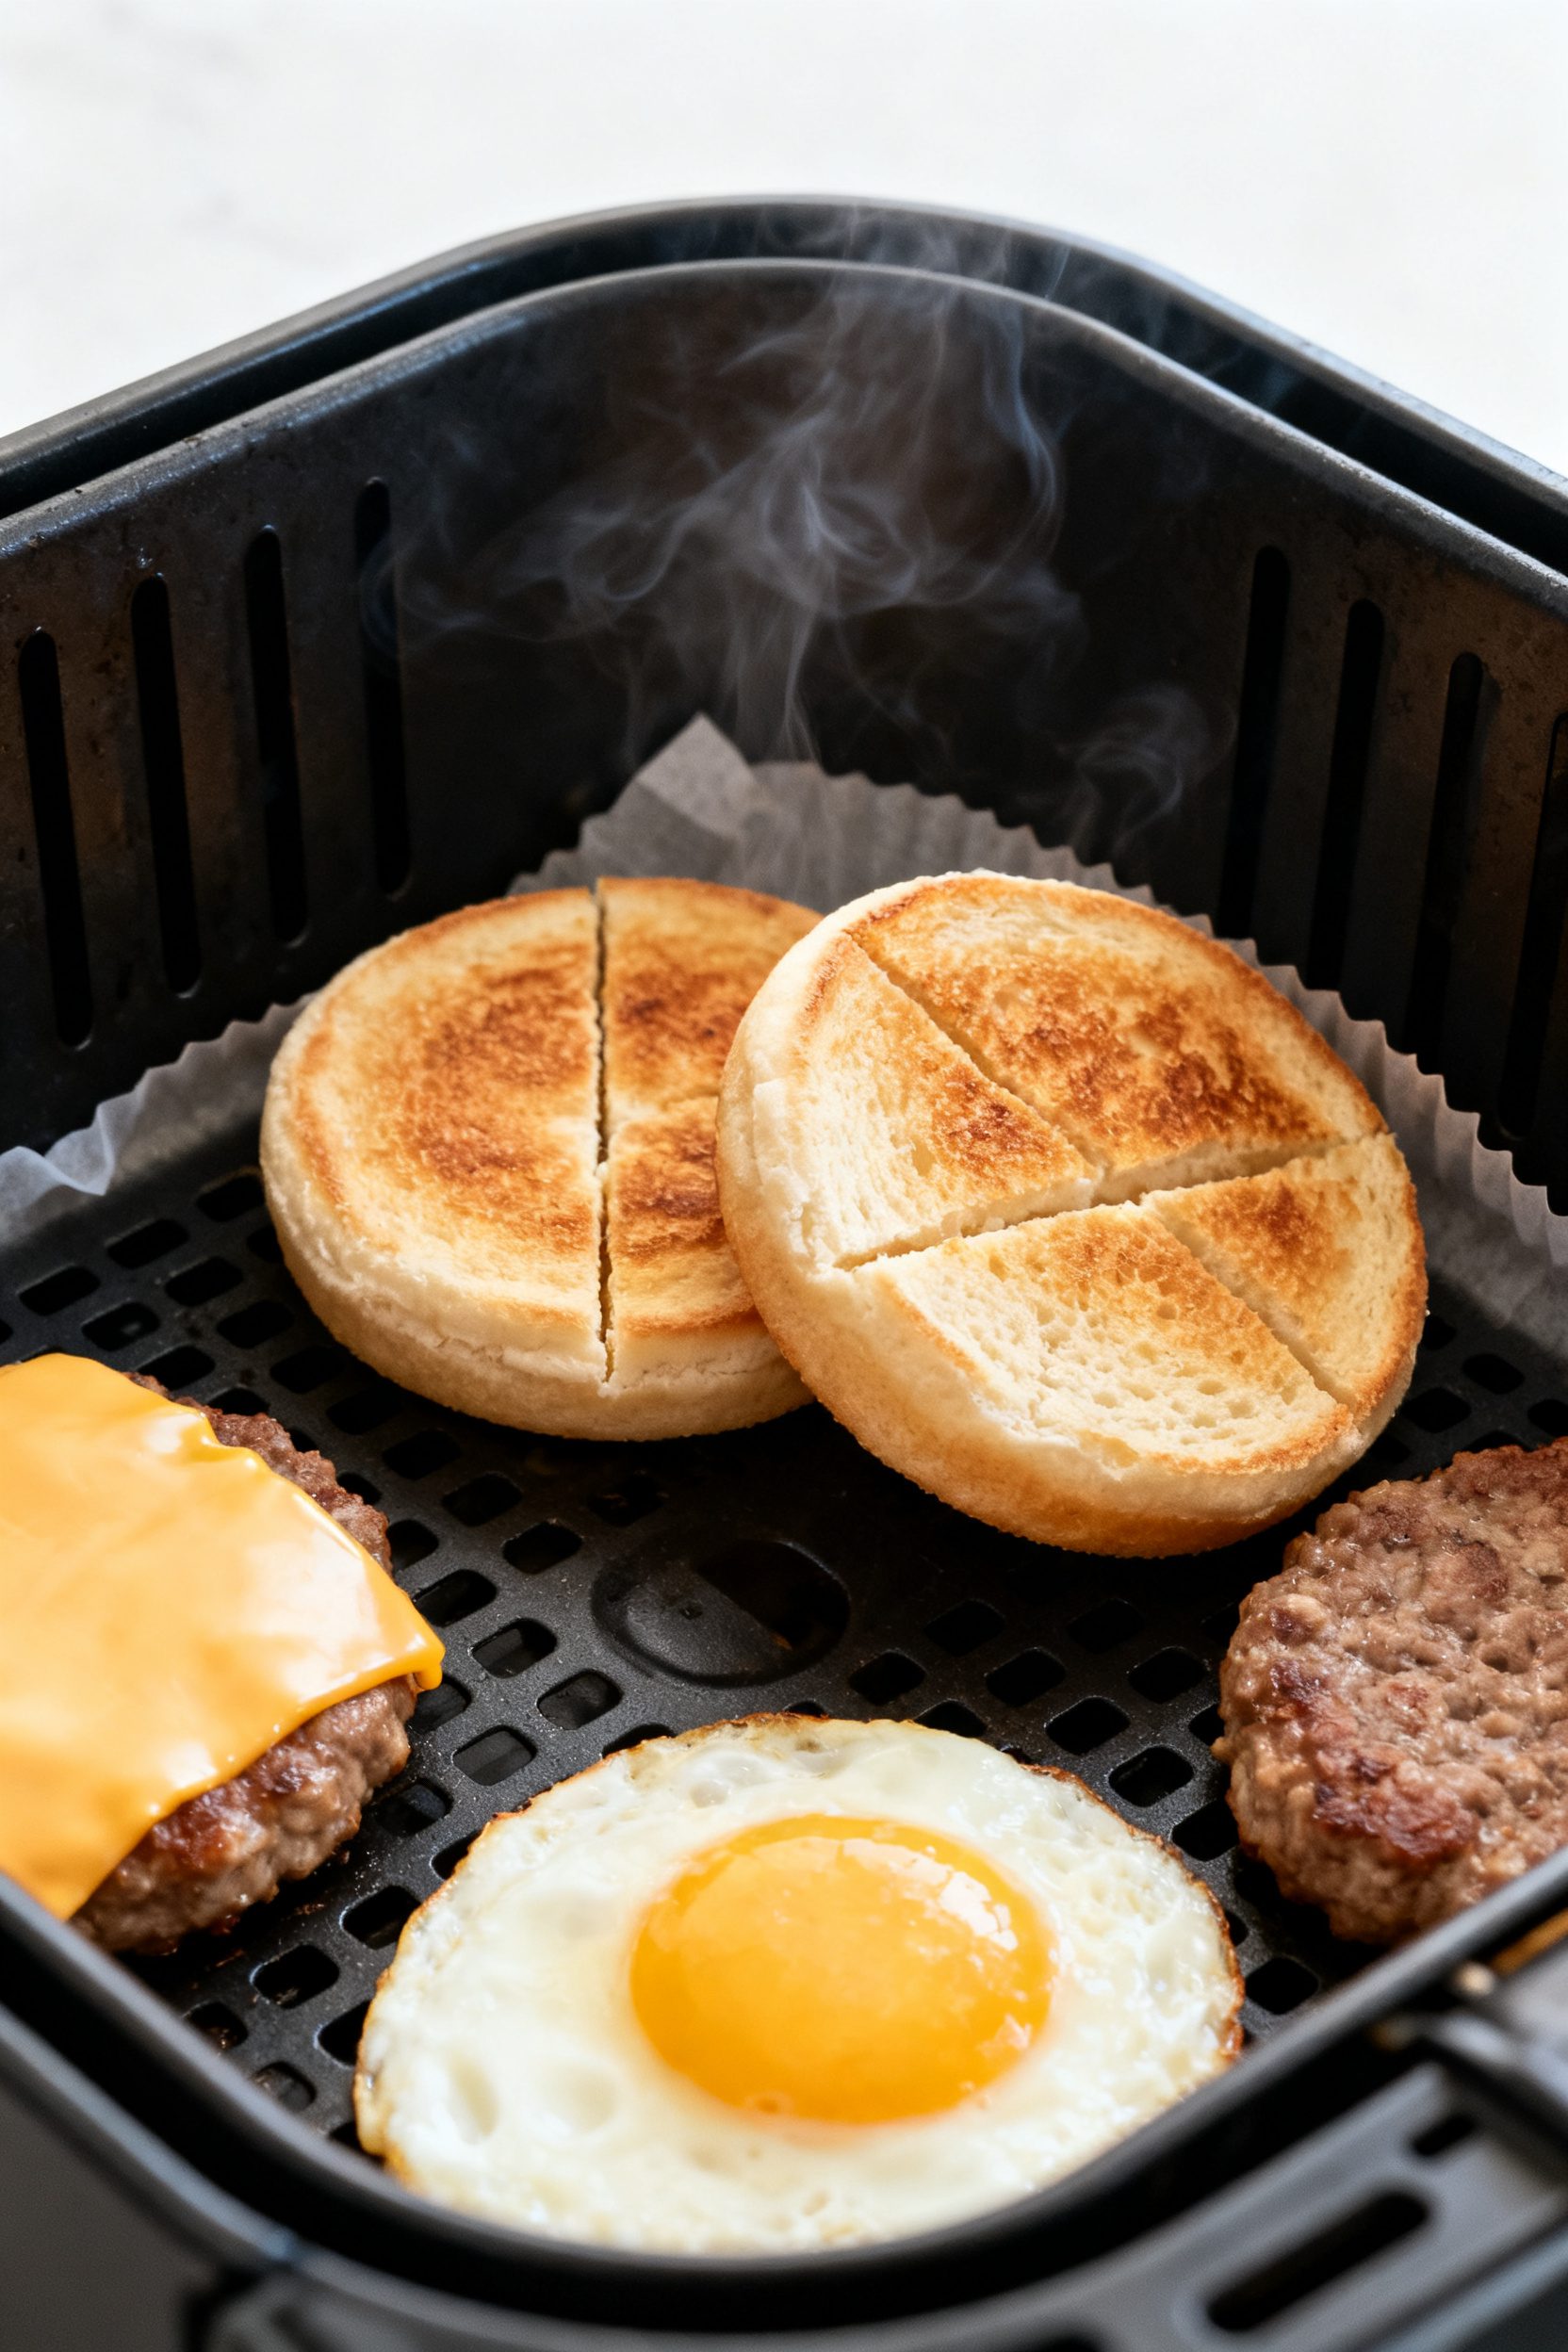
- Arrange in the basket. Place the bread halves cut-side up and the fillings next to them. Avoid stacking so hot air can circulate. Line with parchment only if needed, and never cover all the vents.
- Air fry at 350°F (175°C) for 6–8 minutes. Check at minute 5. The bread should be toasting and the egg/meat warming through.
- Reassemble with cheese. If your sandwich includes cheese, add it in the last 1–2 minutes so it melts without burning. Reassemble the sandwich and return it to the basket.
- Finish at 320–340°F for 2–4 minutes. Lowering the temp at the end melts cheese and heats the core without over-browning the bread.
- Check doneness. The center should be hot and steamy. If the meat or egg still feels cold in the middle, add 1–2 more minutes. Total time typically ranges from 8–12 minutes, depending on thickness and bread type.
- Rest for 1 minute. Let the sandwich sit before eating so the heat evens out and the cheese sets slightly.
- Customize and serve. Add hot sauce, a tomato slice, or greens for freshness. Eat immediately for the best texture.
What Makes This Special
Air fryers nail the sweet spot between speed and texture. You get a crisp exterior and evenly heated center without drying out the eggs or cheese.
Unlike microwaving, the bread won’t turn rubbery. And compared to baking, you don’t need to preheat for ages or dirty extra pans. This method is consistent, fast, and adaptable to whatever sandwich style you have on hand.
Shopping List
- Frozen breakfast sandwiches (any brand; English muffin, bagel, biscuit, or croissant)
- Optional add-ons: sliced cheese, hot sauce, ketchup, mustard, pesto
- Optional fresh extras: tomato slices, avocado, spinach, red onion
- Oil spray (for the basket, if your air fryer tends to stick)
- Foil or parchment (optional, for easy cleanup)
Step-by-Step Instructions
- Preheat the air fryer to 350°F (175°C) for 3–4 minutes.
Preheating helps the bread get crisp without overcooking the middle.
- Unwrap the sandwich. Remove any plastic or paper. If the sandwich is wrapped in a paper sleeve, discard it—it can block air flow.
- Split the sandwich if possible. Gently separate the bread from the egg/meat/cheese while still frozen. This helps heat the middle faster.
If it won’t budge, heat it whole for a couple of minutes first, then separate.
- Arrange in the basket. Place the bread halves cut-side up and the fillings next to them. Avoid stacking so hot air can circulate. Line with parchment only if needed, and never cover all the vents.
- Air fry at 350°F (175°C) for 6–8 minutes. Check at minute 5.
The bread should be toasting and the egg/meat warming through.
- Reassemble with cheese. If your sandwich includes cheese, add it in the last 1–2 minutes so it melts without burning. Reassemble the sandwich and return it to the basket.
- Finish at 320–340°F for 2–4 minutes. Lowering the temp at the end melts cheese and heats the core without over-browning the bread.
- Check doneness. The center should be hot and steamy. If the meat or egg still feels cold in the middle, add 1–2 more minutes.
Total time typically ranges from 8–12 minutes, depending on thickness and bread type.
- Rest for 1 minute. Let the sandwich sit before eating so the heat evens out and the cheese sets slightly.
- Customize and serve. Add hot sauce, a tomato slice, or greens for freshness. Eat immediately for the best texture.
Storage Instructions
If you’ve heated a sandwich and have leftovers, wrap it tightly in foil and refrigerate for up to 2 days. Reheat in the air fryer at 320°F for 4–6 minutes.
Avoid microwaving leftovers if you want to keep the bread crisp. Do not refreeze once cooked. If you’re meal-prepping with homemade sandwiches, wrap individually and freeze; reheat using the same method.

Benefits of This Recipe
- Fast and reliable: From freezer to plate in about 10 minutes, no babysitting required.
- Better texture: Crispy bread, warm center, cheese that actually melts.
- Flexible: Works with muffins, bagels, biscuits, and croissants; easy to customize.
- Minimal cleanup: One basket, no greasy pans.
- Budget-friendly: Frozen sandwiches are often cheaper than drive-thru breakfasts.
What Not to Do
- Don’t skip preheating. Cold baskets lead to uneven heating and soggy bread.
- Don’t overcrowd. Too many sandwiches at once block airflow.
Cook in batches or use racks if your model supports them.
- Don’t crank the heat too high. 400°F can scorch the bread before the center warms. Stick to 320–350°F.
- Don’t keep the cheese on the whole time. It may burn or slide off. Add it near the end.
- Don’t use wax paper. Use parchment or foil only, and keep air vents exposed.
- Don’t reheat in plastic wrap. Always remove all packaging before cooking.
Recipe Variations
- Spicy Sunrise: Add pepper jack cheese, a drizzle of hot honey, and pickled jalapeños after cooking.
- Veggie Boost: Layer in baby spinach and sliced tomato once heated.
A smear of pesto adds a bright, herby kick.
- Bagel Shop Style: Use an everything bagel sandwich and finish with a swipe of cream cheese and cracked black pepper.
- Protein-Heavy: Double the meat or add a second egg patty in the last few minutes to warm through.
- Breakfast BLT: Add crisp air-fried bacon and a leaf of romaine with a touch of mayo after heating.
- Light and Fresh: Swap the cheese for avocado slices and add a squeeze of lemon.
FAQ
Do I need to thaw the sandwich first?
No. Cook straight from frozen. Splitting the sandwich into halves speeds up heating and keeps the bread crisp.
What temperature and time work best?
Start at 350°F (175°C) for 6–8 minutes, then reassemble with cheese and finish at 320–340°F for 2–4 minutes.
Total time is usually 8–12 minutes, depending on thickness and bread type.
How do I keep the cheese from burning?
Add cheese in the last 1–2 minutes or tuck it between the hot egg and meat so it melts gently without direct heat.
Can I cook more than one sandwich at a time?
Yes, as long as they’re in a single layer with space between them. Add 1–2 minutes if your basket is fuller, and rotate halfway through for even heating.
What if my sandwich is still cold in the middle?
Lower the temperature to around 320°F and cook 2–3 more minutes. Splitting the sandwich helps.
You can also flip the fillings halfway for even heat.
Is parchment paper safe in the air fryer?
Yes, as long as it’s perforated or trimmed so it doesn’t block airflow or touch the heating element. Never preheat with loose parchment inside.
Which bread type turns out best?
English muffins and bagels crisp beautifully. Croissants brown quickly, so watch closely and lower the temp for the last few minutes.
Biscuits can dry out—consider a touch of butter after cooking.
Can I add fresh veggies before cooking?
It’s better to add fresh veggies after cooking. Tomatoes and spinach can release moisture, which softens the bread.
How do I prevent the sandwich from drying out?
Don’t overcook. Keep the temp moderate, add cheese at the end, and let the sandwich rest for a minute before eating to redistribute heat and moisture.
Do I need oil?
Usually no.
If your basket sticks, a light spritz of oil on the basket (not the sandwich) helps. Avoid heavy sprays that can make the bread greasy.
Final Thoughts
A frozen air fryer breakfast sandwich checks every box: fast, crispy, melty, and low effort. With a few simple tweaks—like splitting the sandwich and adding cheese at the end—you’ll get results that taste freshly made.
Keep a box in the freezer, and breakfast is always a few minutes away. It’s the kind of small kitchen win that makes busy mornings feel a little easier and a lot tastier.