How to Cook Rice in Air Fryer: Quick, Fluffy Wins
An instant, tasty win for weeknights: rice made in the air fryer that isn’t mushy, overdone, or a total guesswork. Yes, you can win friends and influence meals with barely any cleanup. Let’s dive into a method that’s surprisingly reliable and officially not boring.
Why Cook Rice in an Air Fryer at All?
Rice is usually boiled or steamed, but the air fryer brings a crisp, fluffy twist. You’ll get a light, slightly toasted exterior with a tender center. It’s not traditional, but it’s wildly convenient when you’ve got a crowded kitchen or a tiny stove. FYI, this isn’t meant to replace perfect stovetop rice for sushi-grade dishes, but it’s fantastic for bowls, fried rice foundations, or quick weeknight sides.
Choosing The Right Rice For The Job
- Long-grain white rice cooks up fluffy and separates nicely in the air fryer.
- Medium-grain is a solid middle ground if you want a touch more stickiness for bowls.
- Brown rice works, but it needs extra water and time, so plan ahead.
- Rinse until the water runs clear to remove surface starch and avoid gummy results.
Pro-Level Ratio And Water Math
Here’s the quick math you’ll rely on:
- White rice: 1 cup rice to 1.25 cups water.
- Brown rice: 1 cup rice to 1.75 cups water.
Pro tip: you want the grains just barely covered by water plus a thin sheen. If you drown them, they’ll steam into mush. If they’re dry, they’ll burn. Balance is key, friend.
Prep Step: Rinse, Measure, Rest

- Rinse the rice under cold water until it runs clear. This removes surface starch that makes things sticky.
- Shake off the excess water and measure accurately.
- Let it rest for 5 minutes after rinsing so the grains can hydrate a bit before hitting the heat.
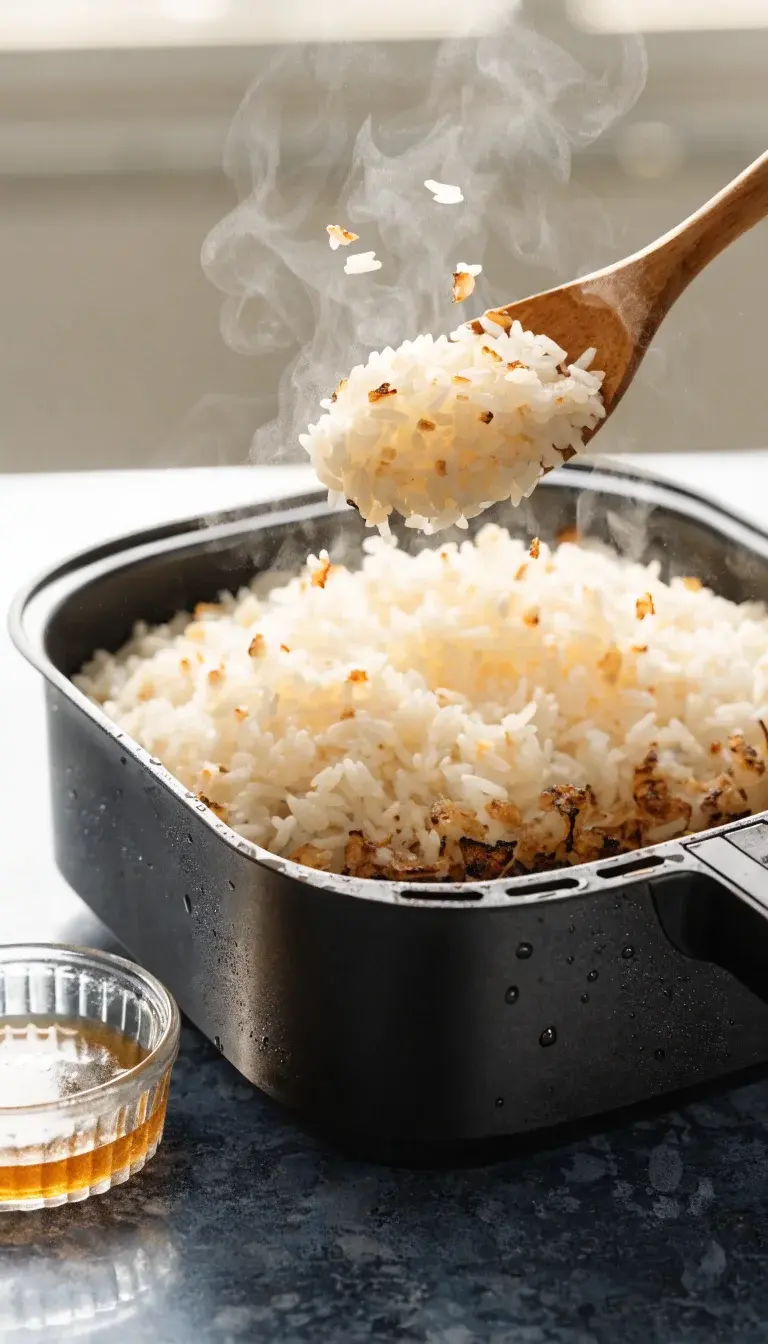
The Air Fryer Method: One Pan, No Mess
Set up like this and you’ll thank yourself later:
- Put rinsed rice and measured water in a small, oven-safe dish that fits inside your air fryer basket.
- Add a light pinch of salt and a teaspoon of oil or a dab of butter for flavor and preventing sticking.
- Cover the dish with foil to trap steam, or use a tight-fitting lid if you have one.
- Cook at a moderate temperature. If your air fryer runs hot, go with 360°F (182°C). If it’s gentler, 340°F (171°C) works too.
- Cook for 15-18 minutes, then check. You want the water absorbed and the top grains tender. If needed, add 2-3 minutes more.
- Let it rest 5 minutes uncovered. Steam continues to finish the job, and you’ll avoid that raw center disaster.
When To Open The Basket (And Why It Matters)
Opening too early releases steam and can make the top layer dry. Don’t rush this. You want a gentle, steady finish. FYI, your future self will thank you for patience here.
Flavor Boosts That Don’t Complicate Things
- Add aromatics: a garlic clove, a bay leaf, or a pinch of cumin seeds go a long way without complicating the dish.
- Use chicken, veggie, or beef broth instead of plain water for deeper flavor.
- Stir in a tiny bit of butter or a drizzle of sesame oil after cooking for shine and aroma.
Turning Rice Into Something Special
If you want a more exciting result, add mix-ins after cooking:
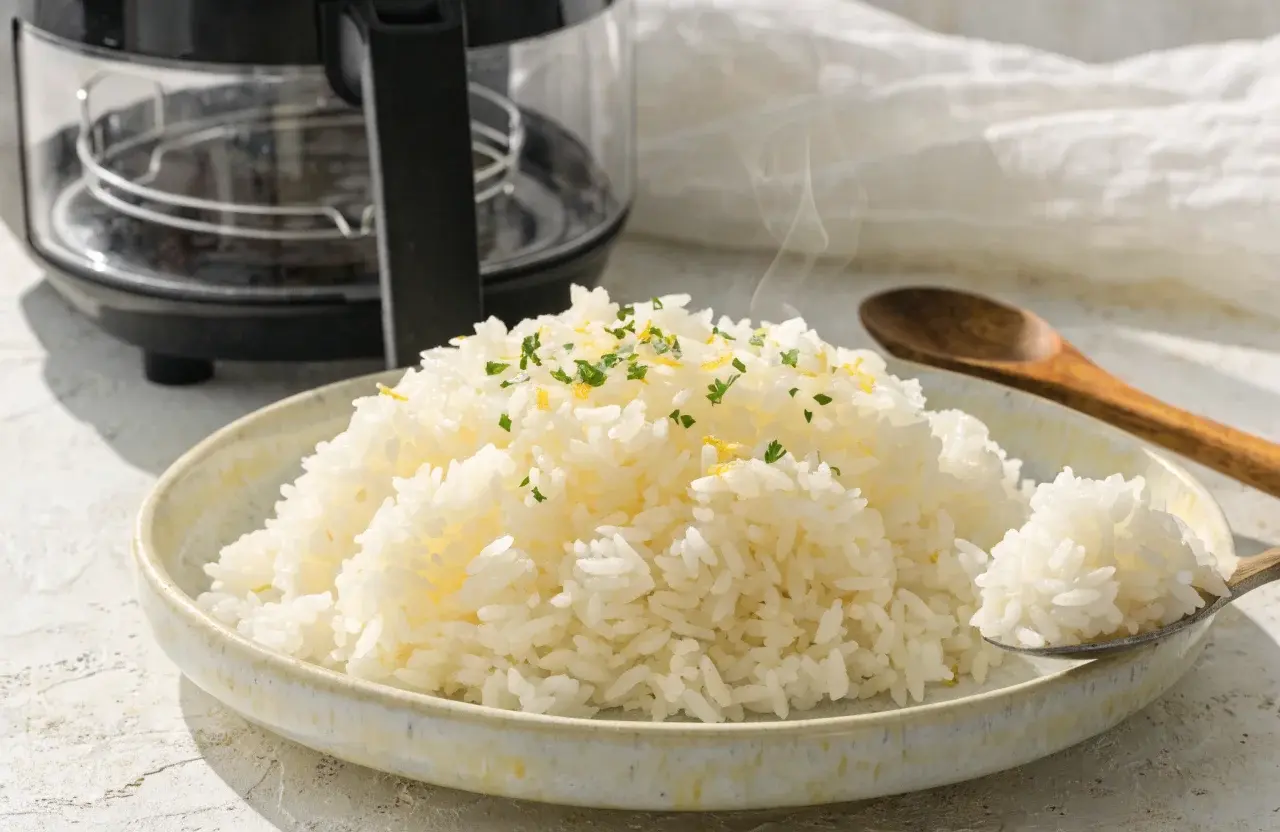
- Fluffy peas and corn for color and texture
- Chopped herbs like cilantro or parsley
- Toasted sesame seeds for crunch and umami
Common Pitfalls And Quick Fixes
- Mushy rice? Not enough drainage or too much water. Try reducing water by 0.25 cup next time and cover a bit less.
- Under-cooked center? Give it a few extra minutes with a splash more water, then rest.
- Sticking? A teaspoon of oil and a light stir at the halfway point helps.
Equipment Tips For Best Results
- Use a small, oven-safe dish that fits your air fryer. A ramekin or mini casserole dish works perfectly.
- Ensure the dish is really oven-safe since air fryers heat efficiently and can scorch if you’re not careful.
- Aluminum foil is your friend for locking in steam. Just don’t crumple it—smooth it out for even cooking.
Batch Cooking: How To Scale Up Without Stress
Cooking larger amounts works, but you’ll need to tweak the water slightly. A good baseline is to maintain the same rice-to-water ratio, but use a larger dish. Stir once after cooking to separate grains and prevent clumping. If you’re feeding a crowd, consider cooking in two batches to avoid overcrowding, which can trap steam and steam-rolling soggy rice.
Storage And Reheating Tips
Store cooled rice in an airtight container in the fridge for up to 4 days. Reheat in the air fryer for 3-5 minutes at 350°F (175°C) until steaming hot, or nuke for 1-2 minutes and break up clumps with a fork. Pro move: sprinkle a splash of water before reheating to revive moisture.
Flavor Pairings That Elevate Air-Fried Rice
- Pair with citrusy or garlicky proteins like lemon duets with chicken or garlic shrimp.
- Match with roasted veggies and a drizzle of soy glaze for a quick weeknight bowl.
- Turn it into a quick fried rice by tossing in diced veggies, a scrambled egg, and a light soy kick after cooking.
FAQ
Q: Can I cook any type of rice in the air fryer?
Mostly yes, but some varieties need more water or longer cook times. Rice blends with brown rice require patience and adjustments. Start with white rice to nail the technique, then experiment with brown or wild blends.
Q: Do I need to rinse the rice?
Yes. Rinsing removes surface starch, keeping grains fluffy rather than gluey. It’s a small step that makes a big difference, IMO.
Q: Why does the top sometimes taste dry?
Too little water or overcooking can dry the surface. Resting helps, and adding a tiny amount of water before cooking can prevent this in future batches.
Q: Can I adapt this for flavored rice?
Absolutely. Toast the grains briefly in a bit of oil before adding water for a nuttier flavor, or swap water for broth and toss in aromatics for enhanced depth.
Q: Is air-fried rice healthier than stovetop?
Healthier is relative. It’s about avoiding excess oil and controlling sodium via broth choices. You’ll still get a tasty, satisfying base for meals without deep-frying anything.
Conclusion
Rice in the air fryer isn’t a gimmick; it’s a legit, easy technique you can rely on when the clock is ticking. With the right water ratio, a covered dish, and a dash of flavor, you’ll produce a light, fluffy grain with a touch of crunch. FYI, this method is a game changer for weeknights and a surprisingly impressive showpiece for casual dinners. Try it tonight and you might just dust off your air fryer every night this week.